google3c8452e124cb77db

Selasa, 30 Agustus 2016

Outputting PDFs with Django

This document explains how to output PDF files dynamically using Django views. This is made possible by the excellent, open-source ReportLab Python PDF library.
The advantage of generating PDF files dynamically is that you can create customized PDFs for different purposes – say, for different users or different pieces of content.
For example, Django was used at kusports.com to generate customized, printer-friendly NCAA tournament brackets, as PDF files, for people participating in a March Madness contest.

Install ReportLab

The ReportLab library is available on PyPI. A user guide (not coincidentally, a PDF file) is also available for download. You can install ReportLab with pip:
$ pip install reportlab
Test your installation by importing it in the Python interactive interpreter:
>>> import reportlab
If that command doesn’t raise any errors, the installation worked.

Write your view

The key to generating PDFs dynamically with Django is that the ReportLab API acts on file-like objects, and Django’sHttpResponse objects are file-like objects.
Here’s a “Hello World” example:
from reportlab.pdfgen import canvas
from django.http import HttpResponse

def some_view(request):
    # Create the HttpResponse object with the appropriate PDF headers.
    response = HttpResponse(content_type='application/pdf')
    response['Content-Disposition'] = 'attachment; filename="somefilename.pdf"'

    # Create the PDF object, using the response object as its "file."
    p = canvas.Canvas(response)

    # Draw things on the PDF. Here's where the PDF generation happens.
    # See the ReportLab documentation for the full list of functionality.
    p.drawString(100, 100, "Hello world.")

    # Close the PDF object cleanly, and we're done.
    p.showPage()
    p.save()
    return response
The code and comments should be self-explanatory, but a few things deserve a mention:
  • The response gets a special MIME type, application/pdf. This tells browsers that the document is a PDF file, rather than an HTML file. If you leave this off, browsers will probably interpret the output as HTML, which would result in ugly, scary gobbledygook in the browser window.
  • The response gets an additional Content-Disposition header, which contains the name of the PDF file. This filename is arbitrary: Call it whatever you want. It’ll be used by browsers in the “Save as...” dialog, etc.
  • The Content-Disposition header starts with 'attachment; ' in this example. This forces Web browsers to pop-up a dialog box prompting/confirming how to handle the document even if a default is set on the machine. If you leave off 'attachment;', browsers will handle the PDF using whatever program/plugin they’ve been configured to use for PDFs. Here’s what that code would look like:
    response['Content-Disposition'] = 'filename="somefilename.pdf"'
    
  • Hooking into the ReportLab API is easy: Just pass response as the first argument to canvas.Canvas. The Canvasclass expects a file-like object, and HttpResponse objects fit the bill.
  • Note that all subsequent PDF-generation methods are called on the PDF object (in this case, p) – not on response.
  • Finally, it’s important to call showPage() and save() on the PDF file.
Note
ReportLab is not thread-safe. Some of our users have reported odd issues with building PDF-generating Django views that are accessed by many people at the same time.

Complex PDFs

If you’re creating a complex PDF document with ReportLab, consider using the io library as a temporary holding place for your PDF file. This library provides a file-like object interface that is particularly efficient. Here’s the above “Hello World” example rewritten to use io:
from io import BytesIO
from reportlab.pdfgen import canvas
from django.http import HttpResponse

def some_view(request):
    # Create the HttpResponse object with the appropriate PDF headers.
    response = HttpResponse(content_type='application/pdf')
    response['Content-Disposition'] = 'attachment; filename="somefilename.pdf"'

    buffer = BytesIO()

    # Create the PDF object, using the BytesIO object as its "file."
    p = canvas.Canvas(buffer)

    # Draw things on the PDF. Here's where the PDF generation happens.
    # See the ReportLab documentation for the full list of functionality.
    p.drawString(100, 100, "Hello world.")

    # Close the PDF object cleanly.
    p.showPage()
    p.save()

    # Get the value of the BytesIO buffer and write it to the response.
    pdf = buffer.getvalue()
    buffer.close()
    response.write(pdf)
    return response

Further resources

  • PDFlib is another PDF-generation library that has Python bindings. To use it with Django, just use the same concepts explained in this article.
  • Pisa XHTML2PDF is yet another PDF-generation library. Pisa ships with an example of how to integrate Pisa with Django.
  • HTMLdoc is a command-line script that can convert HTML to PDF. It doesn’t have a Python interface, but you can escape out to the shell using system or popen and retrieve the output in Python.

Other formats

Notice that there isn’t a lot in these examples that’s PDF-specific – just the bits using reportlab. You can use a similar technique to generate any arbitrary format that you can find a Python library for. Also see Outputting CSV with Django for another example and some techniques you can use when generated text-based formats.
Source : https://docs.djangoproject.com/en/1.8/howto/outputting-pdf/

Minggu, 21 Agustus 2016

Advanced tutorial: How to write reusable apps

Reusability matters

It’s a lot of work to design, build, test and maintain a web application. Many Python and Django projects share common problems. Wouldn’t it be great if we could save some of this repeated work?
Reusability is the way of life in Python. The Python Package Index (PyPI) has a vast range of packages you can use in your own Python programs. Check out Django Packages for existing reusable apps you could incorporate in your project. Django itself is also just a Python package. This means that you can take existing Python packages or Django apps and compose them into your own web project. You only need to write the parts that make your project unique.
Let’s say you were starting a new project that needed a polls app like the one we’ve been working on. How do you make this app reusable? Luckily, you’re well on the way already. In Tutorial 3, we saw how we could decouple polls from the project-level URLconf using an include. In this tutorial, we’ll take further steps to make the app easy to use in new projects and ready to publish for others to install and use.
Package? App?
A Python package provides a way of grouping related Python code for easy reuse. A package contains one or more files of Python code (also known as “modules”).
A package can be imported with import foo.bar or from foo import bar. For a directory (like polls) to form a package, it must contain a special file __init__.py, even if this file is empty.
A Django application is just a Python package that is specifically intended for use in a Django project. An application may use common Django conventions, such as having models, tests, urls, and views submodules.
Later on we use the term packaging to describe the process of making a Python package easy for others to install. It can be a little confusing, we know.

Your project and your reusable app

After the previous tutorials, our project should look like this:
mysite/
    manage.py
    mysite/
        __init__.py
        settings.py
        urls.py
        wsgi.py
    polls/
        __init__.py
        admin.py
        migrations/
            __init__.py
            0001_initial.py
        models.py
        static/
            polls/
                images/
                    background.gif
                style.css
        templates/
            polls/
                detail.html
                index.html
                results.html
        tests.py
        urls.py
        views.py
    templates/
        admin/
            base_site.html
You created mysite/templates in Tutorial 7, and polls/templates in Tutorial 3. Now perhaps it is clearer why we chose to have separate template directories for the project and application: everything that is part of the polls application is in polls. It makes the application self-contained and easier to drop into a new project.
The polls directory could now be copied into a new Django project and immediately reused. It’s not quite ready to be published though. For that, we need to package the app to make it easy for others to install.

Installing some prerequisites

The current state of Python packaging is a bit muddled with various tools. For this tutorial, we’re going to use setuptools to build our package. It’s the recommended packaging tool (merged with the distribute fork). We’ll also be using pip to install and uninstall it. You should install these two packages now. If you need help, you can refer to how to install Django with pip. You can install setuptools the same way.

Packaging your app

Python packaging refers to preparing your app in a specific format that can be easily installed and used. Django itself is packaged very much like this. For a small app like polls, this process isn’t too difficult.
  1. First, create a parent directory for polls, outside of your Django project. Call this directory django-polls.
    Choosing a name for your app
    When choosing a name for your package, check resources like PyPI to avoid naming conflicts with existing packages. It’s often useful to prepend django- to your module name when creating a package to distribute. This helps others looking for Django apps identify your app as Django specific.
    Application labels (that is, the final part of the dotted path to application packages) must be unique in INSTALLED_APPS. Avoid using the same label as any of the Django contrib packages, for example auth, admin, or messages.
  2. Move the polls directory into the django-polls directory.
  3. Create a file django-polls/README.rst with the following contents:
    django-polls/README.rst
    =====
    Polls
    =====
    
    Polls is a simple Django app to conduct Web-based polls. For each
    question, visitors can choose between a fixed number of answers.
    
    Detailed documentation is in the "docs" directory.
    
    Quick start
    -----------
    
    1. Add "polls" to your INSTALLED_APPS setting like this::
    
        INSTALLED_APPS = [
            ...
            'polls',
        ]
    
    2. Include the polls URLconf in your project urls.py like this::
    
        url(r'^polls/', include('polls.urls')),
    
    3. Run `python manage.py migrate` to create the polls models.
    
    4. Start the development server and visit http://127.0.0.1:8000/admin/
       to create a poll (you'll need the Admin app enabled).
    
    5. Visit http://127.0.0.1:8000/polls/ to participate in the poll.
    
  4. Create a django-polls/LICENSE file. Choosing a license is beyond the scope of this tutorial, but suffice it to say that code released publicly without a license is useless. Django and many Django-compatible apps are distributed under the BSD license; however, you’re free to pick your own license. Just be aware that your licensing choice will affect who is able to use your code.
  5. Next we’ll create a setup.py file which provides details about how to build and install the app. A full explanation of this file is beyond the scope of this tutorial, but the setuptools docs have a good explanation. Create a file django-polls/setup.py with the following contents:
    django-polls/setup.py
    import os
    from setuptools import find_packages, setup
    
    with open(os.path.join(os.path.dirname(__file__), 'README.rst')) as readme:
        README = readme.read()
    
    # allow setup.py to be run from any path
    os.chdir(os.path.normpath(os.path.join(os.path.abspath(__file__), os.pardir)))
    
    setup(
        name='django-polls',
        version='0.1',
        packages=find_packages(),
        include_package_data=True,
        license='BSD License',  # example license
        description='A simple Django app to conduct Web-based polls.',
        long_description=README,
        url='https://www.example.com/',
        author='Your Name',
        author_email='yourname@example.com',
        classifiers=[
            'Environment :: Web Environment',
            'Framework :: Django',
            'Framework :: Django :: X.Y',  # replace "X.Y" as appropriate
            'Intended Audience :: Developers',
            'License :: OSI Approved :: BSD License',  # example license
            'Operating System :: OS Independent',
            'Programming Language :: Python',
            # Replace these appropriately if you are stuck on Python 2.
            'Programming Language :: Python :: 3',
            'Programming Language :: Python :: 3.4',
            'Programming Language :: Python :: 3.5',
            'Topic :: Internet :: WWW/HTTP',
            'Topic :: Internet :: WWW/HTTP :: Dynamic Content',
        ],
    )
    
  6. Only Python modules and packages are included in the package by default. To include additional files, we’ll need to create a MANIFEST.in file. The setuptools docs referred to in the previous step discuss this file in more details. To include the templates, the README.rst and our LICENSE file, create a file django-polls/MANIFEST.in with the following contents:
    django-polls/MANIFEST.in
    include LICENSE
    include README.rst
    recursive-include polls/static *
    recursive-include polls/templates *
    
  7. It’s optional, but recommended, to include detailed documentation with your app. Create an empty directory django-polls/docs for future documentation. Add an additional line to django-polls/MANIFEST.in:
    recursive-include docs *
    
    Note that the docs directory won’t be included in your package unless you add some files to it. Many Django apps also provide their documentation online through sites like readthedocs.org.
  8. Try building your package with python setup.py sdist (run from inside django-polls). This creates a directory called dist and builds your new package, django-polls-0.1.tar.gz.
For more information on packaging, see Python’s Tutorial on Packaging and Distributing Projects.

Using your own package

Since we moved the polls directory out of the project, it’s no longer working. We’ll now fix this by installing our new django-polls package.
Installing as a user library
The following steps install django-polls as a user library. Per-user installs have a lot of advantages over installing the package system-wide, such as being usable on systems where you don’t have administrator access as well as preventing the package from affecting system services and other users of the machine.
Note that per-user installations can still affect the behavior of system tools that run as that user, so virtualenv is a more robust solution (see below).
  1. To install the package, use pip (you already installed it, right?):
    pip install --user django-polls/dist/django-polls-0.1.tar.gz
    
  2. With luck, your Django project should now work correctly again. Run the server again to confirm this.
  3. To uninstall the package, use pip:
    pip uninstall django-polls
    

Publishing your app

Now that we’ve packaged and tested django-polls, it’s ready to share with the world! If this wasn’t just an example, you could now:
  • Email the package to a friend.
  • Upload the package on your website.
  • Post the package on a public repository, such as the Python Package Index (PyPI). packaging.python.org has a good tutorial for doing this.

Installing Python packages with virtualenv

Earlier, we installed the polls app as a user library. This has some disadvantages:
  • Modifying the user libraries can affect other Python software on your system.
  • You won’t be able to run multiple versions of this package (or others with the same name).
Typically, these situations only arise once you’re maintaining several Django projects. When they do, the best solution is to use virtualenv. This tool allows you to maintain multiple isolated Python environments, each with its own copy of the libraries and package namespace.

Source : https://docs.djangoproject.com/en/1.10/intro/reusable-apps/

Writing your first Django app, part 7

Customize the admin form

By registering the Question model with admin.site.register(Question), Django was able to construct a default form representation. Often, you’ll want to customize how the admin form looks and works. You’ll do this by telling Django the options you want when you register the object.
Let’s see how this works by reordering the fields on the edit form. Replace the admin.site.register(Question) line with:
polls/admin.py
from django.contrib import admin

from .models import Question


class QuestionAdmin(admin.ModelAdmin):
    fields = ['pub_date', 'question_text']

admin.site.register(Question, QuestionAdmin)
You’ll follow this pattern – create a model admin class, then pass it as the second argument to admin.site.register() – any time you need to change the admin options for a model.
This particular change above makes the “Publication date” come before the “Question” field:
Fields have been reordered This isn’t impressive with only two fields, but for admin forms with dozens of fields, choosing an intuitive order is an important usability detail.
And speaking of forms with dozens of fields, you might want to split the form up into fieldsets:
polls/admin.py
from django.contrib import admin

from .models import Question


class QuestionAdmin(admin.ModelAdmin):
    fieldsets = [
        (None,               {'fields': ['question_text']}),
        ('Date information', {'fields': ['pub_date']}),
    ]

admin.site.register(Question, QuestionAdmin)
The first element of each tuple in fieldsets is the title of the fieldset. Here’s what our form looks like now:
Form has fieldsets now

Customize the admin change list

Now that the Question admin page is looking good, let’s make some tweaks to the “change list” page – the one that displays all the questions in the system.
Here’s what it looks like at this point:
Polls change list page 
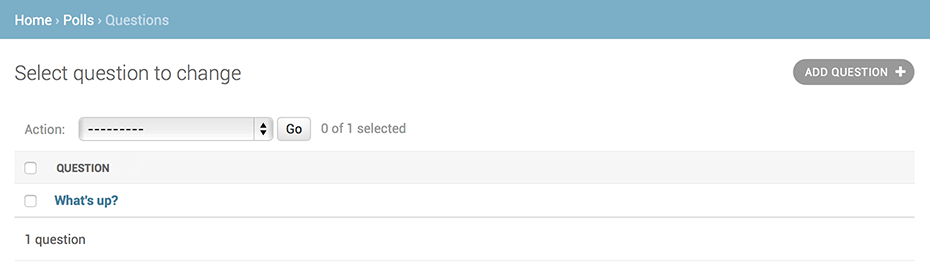
By default, Django displays the str() of each object. But sometimes it’d be more helpful if we could display individual fields. To do that, use the list_display admin option, which is a tuple of field names to display, as columns, on the change list page for the object:
polls/admin.py
class QuestionAdmin(admin.ModelAdmin):
    # ...
    list_display = ('question_text', 'pub_date')
Just for good measure, let’s also include the was_published_recently() method from Tutorial 2:
polls/admin.py
class QuestionAdmin(admin.ModelAdmin):
    # ...
    list_display = ('question_text', 'pub_date', 'was_published_recently')
Now the question change list page looks like this:
Polls change list page, updated You can click on the column headers to sort by those values – except in the case of the was_published_recently header, because sorting by the output of an arbitrary method is not supported. Also note that the column header for was_published_recently is, by default, the name of the method (with underscores replaced with spaces), and that each line contains the string representation of the output.
You can improve that by giving that method (in polls/models.py) a few attributes, as follows:
polls/models.py
class Question(models.Model):
    # ...
    def was_published_recently(self):
        now = timezone.now()
        return now - datetime.timedelta(days=1) <= self.pub_date <= now
    was_published_recently.admin_order_field = 'pub_date'
    was_published_recently.boolean = True
    was_published_recently.short_description = 'Published recently?'
For more information on these method properties, see list_display.
Edit your polls/admin.py file again and add an improvement to the Question change list page: filters using the list_filter. Add the following line to QuestionAdmin:
list_filter = ['pub_date']
That adds a “Filter” sidebar that lets people filter the change list by the pub_date field:
Polls change list page, updated The type of filter displayed depends on the type of field you’re filtering on. Because pub_date is a DateTimeField, Django knows to give appropriate filter options: “Any date”, “Today”, “Past 7 days”, “This month”, “This year”.
This is shaping up well. Let’s add some search capability:
search_fields = ['question_text']
That adds a search box at the top of the change list. When somebody enters search terms, Django will search the question_text field. You can use as many fields as you’d like – although because it uses a LIKE query behind the scenes, limiting the number of search fields to a reasonable number will make it easier for your database to do the search.
Now’s also a good time to note that change lists give you free pagination. The default is to display 100 items per page. Change list pagination, search boxes, filters, date-hierarchies, and column-header-ordering all work together like you think they should.

Customize the admin look and feel

Clearly, having “Django administration” at the top of each admin page is ridiculous. It’s just placeholder text.
That’s easy to change, though, using Django’s template system. The Django admin is powered by Django itself, and its interfaces use Django’s own template system.

Customizing your project’s templates

Create a templates directory in your project directory (the one that contains manage.py). Templates can live anywhere on your filesystem that Django can access. (Django runs as whatever user your server runs.) However, keeping your templates within the project is a good convention to follow.
Open your settings file (mysite/settings.py, remember) and add a DIRS option in the TEMPLATES setting:
mysite/settings.py
TEMPLATES = [
    {
        'BACKEND': 'django.template.backends.django.DjangoTemplates',
        'DIRS': [os.path.join(BASE_DIR, 'templates')],
        'APP_DIRS': True,
        'OPTIONS': {
            'context_processors': [
                'django.template.context_processors.debug',
                'django.template.context_processors.request',
                'django.contrib.auth.context_processors.auth',
                'django.contrib.messages.context_processors.messages',
            ],
        },
    },
]
DIRS is a list of filesystem directories to check when loading Django templates; it’s a search path.
Organizing templates
Just like the static files, we could have all our templates together, in one big templates directory, and it would work perfectly well. However, templates that belong to a particular application should be placed in that application’s template directory (e.g. polls/templates) rather than the project’s (templates). We’ll discuss in more detail in the reusable apps tutorial why we do this.
Now create a directory called admin inside templates, and copy the template admin/base_site.html from within the default Django admin template directory in the source code of Django itself (django/contrib/admin/templates) into that directory.
Where are the Django source files?
If you have difficulty finding where the Django source files are located on your system, run the following command:
$ python -c "import django; print(django.__path__)"
Then, just edit the file and replace {{ site_header|default:_('Django administration') }} (including the curly braces) with your own site’s name as you see fit. You should end up with a section of code like:
{% block branding %}
<h1 id="site-name"><a href="{% url 'admin:index' %}">Polls Administration</a></h1>
{% endblock %}
We use this approach to teach you how to override templates. In an actual project, you would probably use the django.contrib.admin.AdminSite.site_header attribute to more easily make this particular customization.
This template file contains lots of text like {% block branding %} and {{ title }}. The {% and {{ tags are part of Django’s template language. When Django renders admin/base_site.html, this template language will be evaluated to produce the final HTML page, just like we saw in Tutorial 3.
Note that any of Django’s default admin templates can be overridden. To override a template, just do the same thing you did with base_site.html – copy it from the default directory into your custom directory, and make changes.

Customizing your application’s templates

Astute readers will ask: But if DIRS was empty by default, how was Django finding the default admin templates? The answer is that, since APP_DIRS is set to True, Django automatically looks for a templates/ subdirectory within each application package, for use as a fallback (don’t forget that django.contrib.admin is an application).
Our poll application is not very complex and doesn’t need custom admin templates. But if it grew more sophisticated and required modification of Django’s standard admin templates for some of its functionality, it would be more sensible to modify the application’s templates, rather than those in the project. That way, you could include the polls application in any new project and be assured that it would find the custom templates it needed.
See the template loading documentation for more information about how Django finds its templates.

Customize the admin index page

On a similar note, you might want to customize the look and feel of the Django admin index page.
By default, it displays all the apps in INSTALLED_APPS that have been registered with the admin application, in alphabetical order. You may want to make significant changes to the layout. After all, the index is probably the most important page of the admin, and it should be easy to use.
The template to customize is admin/index.html. (Do the same as with admin/base_site.html in the previous section – copy it from the default directory to your custom template directory). Edit the file, and you’ll see it uses a template variable called app_list. That variable contains every installed Django app. Instead of using that, you can hard-code links to object-specific admin pages in whatever way you think is best.

Source : https://docs.djangoproject.com/en/1.10/intro/tutorial07/

Rabu, 17 Agustus 2016

Writing your first Django app, part 6

Aside from the HTML generated by the server, web applications generally need to serve additional files — such as images, JavaScript, or CSS — necessary to render the complete web page. In Django, we refer to these files as “static files”.
For small projects, this isn’t a big deal, because you can just keep the static files somewhere your web server can find it. However, in bigger projects – especially those comprised of multiple apps – dealing with the multiple sets of static files provided by each application starts to get tricky.
That’s what django.contrib.staticfiles is for: it collects static files from each of your applications (and any other places you specify) into a single location that can easily be served in production.

Customize your app’s look and feel

First, create a directory called static in your polls directory. Django will look for static files there, similarly to how Django finds templates inside polls/templates/.
Django’s STATICFILES_FINDERS setting contains a list of finders that know how to discover static files from various sources. One of the defaults is AppDirectoriesFinder which looks for a “static” subdirectory in each of the INSTALLED_APPS, like the one in polls we just created. The admin site uses the same directory structure for its static files.
Within the static directory you have just created, create another directory called polls and within that create a file called style.css. In other words, your stylesheet should be at polls/static/polls/style.css. Because of how the AppDirectoriesFinder staticfile finder works, you can refer to this static file in Django simply as polls/style.css, similar to how you reference the path for templates.
Static file namespacing
Just like templates, we might be able to get away with putting our static files directly in polls/static (rather than creating another polls subdirectory), but it would actually be a bad idea. Django will choose the first static file it finds whose name matches, and if you had a static file with the same name in a different application, Django would be unable to distinguish between them. We need to be able to point Django at the right one, and the easiest way to ensure this is by namespacing them. That is, by putting those static files inside another directory named for the application itself.
Put the following code in that stylesheet (polls/static/polls/style.css):
polls/static/polls/style.css
li a {
    color: green;
}
Next, add the following at the top of polls/templates/polls/index.html:
polls/templates/polls/index.html
{% load static %}

<link rel="stylesheet" type="text/css" href="{% static 'polls/style.css' %}" />
The {% static %} template tag generates the absolute URL of static files.
That’s all you need to do for development. Reload http://localhost:8000/polls/ and you should see that the question links are green (Django style!) which means that your stylesheet was properly loaded.

Adding a background-image

Next, we’ll create a subdirectory for images. Create an images subdirectory in the polls/static/polls/ directory. Inside this directory, put an image called background.gif. In other words, put your image in polls/static/polls/images/background.gif.
Then, add to your stylesheet (polls/static/polls/style.css):
polls/static/polls/style.css
body {
    background: white url("images/background.gif") no-repeat right bottom;
}
Reload http://localhost:8000/polls/ and you should see the background loaded in the bottom right of the screen.
Warning
Of course the {% static %} template tag is not available for use in static files like your stylesheet which aren’t generated by Django. You should always use relative paths to link your static files between each other, because then you can change STATIC_URL (used by the static template tag to generate its URLs) without having to modify a bunch of paths in your static files as well.
These are the basics. For more details on settings and other bits included with the framework see the static files howto and the staticfiles reference. Deploying static files discusses how to use static files on a real server.


Source : https://docs.djangoproject.com/en/1.10/intro/tutorial06/

Writing your first Django app, part 5

Introducing automated testing


What are automated tests?

Tests are simple routines that check the operation of your code.
Testing operates at different levels. Some tests might apply to a tiny detail (does a particular model method return values as expected?) while others examine the overall operation of the software (does a sequence of user inputs on the site produce the desired result?). That’s no different from the kind of testing you did earlier in Tutorial 2, using the shell to examine the behavior of a method, or running the application and entering data to check how it behaves.
What’s different in automated tests is that the testing work is done for you by the system. You create a set of tests once, and then as you make changes to your app, you can check that your code still works as you originally intended, without having to perform time consuming manual testing.

Why you need to create tests

So why create tests, and why now?
You may feel that you have quite enough on your plate just learning Python/Django, and having yet another thing to learn and do may seem overwhelming and perhaps unnecessary. After all, our polls application is working quite happily now; going through the trouble of creating automated tests is not going to make it work any better. If creating the polls application is the last bit of Django programming you will ever do, then true, you don’t need to know how to create automated tests. But, if that’s not the case, now is an excellent time to learn.

Tests will save you time

Up to a certain point, ‘checking that it seems to work’ will be a satisfactory test. In a more sophisticated application, you might have dozens of complex interactions between components.
A change in any of those components could have unexpected consequences on the application’s behavior. Checking that it still ‘seems to work’ could mean running through your code’s functionality with twenty different variations of your test data just to make sure you haven’t broken something - not a good use of your time.
That’s especially true when automated tests could do this for you in seconds. If something’s gone wrong, tests will also assist in identifying the code that’s causing the unexpected behavior.
Sometimes it may seem a chore to tear yourself away from your productive, creative programming work to face the unglamorous and unexciting business of writing tests, particularly when you know your code is working properly.
However, the task of writing tests is a lot more fulfilling than spending hours testing your application manually or trying to identify the cause of a newly-introduced problem.

Tests don’t just identify problems, they prevent them

It’s a mistake to think of tests merely as a negative aspect of development.
Without tests, the purpose or intended behavior of an application might be rather opaque. Even when it’s your own code, you will sometimes find yourself poking around in it trying to find out what exactly it’s doing.
Tests change that; they light up your code from the inside, and when something goes wrong, they focus light on the part that has gone wrong - even if you hadn’t even realized it had gone wrong.

Tests make your code more attractive

You might have created a brilliant piece of software, but you will find that many other developers will simply refuse to look at it because it lacks tests; without tests, they won’t trust it. Jacob Kaplan-Moss, one of Django’s original developers, says “Code without tests is broken by design.”
That other developers want to see tests in your software before they take it seriously is yet another reason for you to start writing tests.

Tests help teams work together

The previous points are written from the point of view of a single developer maintaining an application. Complex applications will be maintained by teams. Tests guarantee that colleagues don’t inadvertently break your code (and that you don’t break theirs without knowing). If you want to make a living as a Django programmer, you must be good at writing tests!

Basic testing strategies

There are many ways to approach writing tests.
Some programmers follow a discipline called “test-driven development”; they actually write their tests before they write their code. This might seem counter-intuitive, but in fact it’s similar to what most people will often do anyway: they describe a problem, then create some code to solve it. Test-driven development simply formalizes the problem in a Python test case.
More often, a newcomer to testing will create some code and later decide that it should have some tests. Perhaps it would have been better to write some tests earlier, but it’s never too late to get started.
Sometimes it’s difficult to figure out where to get started with writing tests. If you have written several thousand lines of Python, choosing something to test might not be easy. In such a case, it’s fruitful to write your first test the next time you make a change, either when you add a new feature or fix a bug.
So let’s do that right away.

Writing our first test


We identify a bug

Fortunately, there’s a little bug in the polls application for us to fix right away: the Question.was_published_recently() method returns True if the Question was published within the last day (which is correct) but also if the Question’s pub_date field is in the future (which certainly isn’t).
To check if the bug really exists, using the Admin create a question whose date lies in the future and check the method using the shell:
>>> import datetime
>>> from django.utils import timezone
>>> from polls.models import Question
>>> # create a Question instance with pub_date 30 days in the future
>>> future_question = Question(pub_date=timezone.now() + datetime.timedelta(days=30))
>>> # was it published recently?
>>> future_question.was_published_recently()
True
Since things in the future are not ‘recent’, this is clearly wrong.

Create a test to expose the bug

What we’ve just done in the shell to test for the problem is exactly what we can do in an automated test, so let’s turn that into an automated test.
A conventional place for an application’s tests is in the application’s tests.py file; the testing system will automatically find tests in any file whose name begins with test.
Put the following in the tests.py file in the polls application:
polls/tests.py
import datetime

from django.utils import timezone
from django.test import TestCase

from .models import Question


class QuestionMethodTests(TestCase):

    def test_was_published_recently_with_future_question(self):
        """
        was_published_recently() should return False for questions whose
        pub_date is in the future.
        """
        time = timezone.now() + datetime.timedelta(days=30)
        future_question = Question(pub_date=time)
        self.assertIs(future_question.was_published_recently(), False)
What we have done here is created a django.test.TestCase subclass with a method that creates a Question instance with a pub_date in the future. We then check the output of was_published_recently() - which ought to be False.

Running tests

In the terminal, we can run our test:
$ python manage.py test polls
and you’ll see something like:
Creating test database for alias 'default'...
F
======================================================================
FAIL: test_was_published_recently_with_future_question (polls.tests.QuestionMethodTests)
----------------------------------------------------------------------
Traceback (most recent call last):
  File "/path/to/mysite/polls/tests.py", line 16, in test_was_published_recently_with_future_question
    self.assertIs(future_question.was_published_recently(), False)
AssertionError: True is not False

----------------------------------------------------------------------
Ran 1 test in 0.001s

FAILED (failures=1)
Destroying test database for alias 'default'...
What happened is this:
  • python manage.py test polls looked for tests in the polls application
  • it found a subclass of the django.test.TestCase class
  • it created a special database for the purpose of testing
  • it looked for test methods - ones whose names begin with test
  • in test_was_published_recently_with_future_question it created a Question instance whose pub_date field is 30 days in the future
  • ... and using the assertEqual() method, it discovered that its was_published_recently() returns True, though we wanted it to return False
The test informs us which test failed and even the line on which the failure occurred.

Fixing the bug

We already know what the problem is: Question.was_published_recently() should return False if its pub_date is in the future. Amend the method in models.py, so that it will only return True if the date is also in the past:
polls/models.py
def was_published_recently(self):
    now = timezone.now()
    return now - datetime.timedelta(days=1) <= self.pub_date <= now
and run the test again:
Creating test database for alias 'default'...
.
----------------------------------------------------------------------
Ran 1 test in 0.001s

OK
Destroying test database for alias 'default'...
After identifying a bug, we wrote a test that exposes it and corrected the bug in the code so our test passes.
Many other things might go wrong with our application in the future, but we can be sure that we won’t inadvertently reintroduce this bug, because simply running the test will warn us immediately. We can consider this little portion of the application pinned down safely forever.

More comprehensive tests

While we’re here, we can further pin down the was_published_recently() method; in fact, it would be positively embarrassing if in fixing one bug we had introduced another.
Add two more test methods to the same class, to test the behavior of the method more comprehensively:
polls/tests.py
def test_was_published_recently_with_old_question(self):
    """
    was_published_recently() should return False for questions whose
    pub_date is older than 1 day.
    """
    time = timezone.now() - datetime.timedelta(days=30)
    old_question = Question(pub_date=time)
    self.assertIs(old_question.was_published_recently(), False)

def test_was_published_recently_with_recent_question(self):
    """
    was_published_recently() should return True for questions whose
    pub_date is within the last day.
    """
    time = timezone.now() - datetime.timedelta(hours=1)
    recent_question = Question(pub_date=time)
    self.assertIs(recent_question.was_published_recently(), True)
And now we have three tests that confirm that Question.was_published_recently() returns sensible values for past, recent, and future questions.
Again, polls is a simple application, but however complex it grows in the future and whatever other code it interacts with, we now have some guarantee that the method we have written tests for will behave in expected ways.

Test a view

The polls application is fairly undiscriminating: it will publish any question, including ones whose pub_date field lies in the future. We should improve this. Setting a pub_date in the future should mean that the Question is published at that moment, but invisible until then.

A test for a view

When we fixed the bug above, we wrote the test first and then the code to fix it. In fact that was a simple example of test-driven development, but it doesn’t really matter in which order we do the work.
In our first test, we focused closely on the internal behavior of the code. For this test, we want to check its behavior as it would be experienced by a user through a web browser.
Before we try to fix anything, let’s have a look at the tools at our disposal.

The Django test client

Django provides a test Client to simulate a user interacting with the code at the view level. We can use it in tests.py or even in the shell.
We will start again with the shell, where we need to do a couple of things that won’t be necessary in tests.py. The first is to set up the test environment in the shell:
>>> from django.test.utils import setup_test_environment
>>> setup_test_environment()
setup_test_environment() installs a template renderer which will allow us to examine some additional attributes on responses such as response.context that otherwise wouldn’t be available. Note that this method does not setup a test database, so the following will be run against the existing database and the output may differ slightly depending on what questions you already created.
Next we need to import the test client class (later in tests.py we will use the django.test.TestCase class, which comes with its own client, so this won’t be required):
>>> from django.test import Client
>>> # create an instance of the client for our use
>>> client = Client()
With that ready, we can ask the client to do some work for us:
>>> # get a response from '/'
>>> response = client.get('/')
>>> # we should expect a 404 from that address
>>> response.status_code
404
>>> # on the other hand we should expect to find something at '/polls/'
>>> # we'll use 'reverse()' rather than a hardcoded URL
>>> from django.urls import reverse
>>> response = client.get(reverse('polls:index'))
>>> response.status_code
200
>>> response.content
b'\n\n\n    <p>No polls are available.</p>\n\n'
>>> # note - you might get unexpected results if your ``TIME_ZONE``
>>> # in ``settings.py`` is not correct. If you need to change it,
>>> # you will also need to restart your shell session
>>> from polls.models import Question
>>> from django.utils import timezone
>>> # create a Question and save it
>>> q = Question(question_text="Who is your favorite Beatle?", pub_date=timezone.now())
>>> q.save()
>>> # check the response once again
>>> response = client.get('/polls/')
>>> response.content
b'\n\n\n    <ul>\n    \n        <li><a href="/polls/1/">Who is your favorite Beatle?</a></li>\n    \n    </ul>\n\n'
>>> # If the following doesn't work, you probably omitted the call to
>>> # setup_test_environment() described above
>>> response.context['latest_question_list']
<QuerySet [<Question: Who is your favorite Beatle?>]>

Improving our view

The list of polls shows polls that aren’t published yet (i.e. those that have a pub_date in the future). Let’s fix that.
In Tutorial 4 we introduced a class-based view, based on ListView:
polls/views.py
class IndexView(generic.ListView):
    template_name = 'polls/index.html'
    context_object_name = 'latest_question_list'

    def get_queryset(self):
        """Return the last five published questions."""
        return Question.objects.order_by('-pub_date')[:5]
We need to amend the get_queryset() method and change it so that it also checks the date by comparing it with timezone.now(). First we need to add an import:
polls/views.py
from django.utils import timezone
and then we must amend the get_queryset method like so:
polls/views.py
def get_queryset(self):
    """
    Return the last five published questions (not including those set to be
    published in the future).
    """
    return Question.objects.filter(
        pub_date__lte=timezone.now()
    ).order_by('-pub_date')[:5]
Question.objects.filter(pub_date__lte=timezone.now()) returns a queryset containing Questions whose pub_date is less than or equal to - that is, earlier than or equal to - timezone.now.

Testing our new view

Now you can satisfy yourself that this behaves as expected by firing up the runserver, loading the site in your browser, creating Questions with dates in the past and future, and checking that only those that have been published are listed. You don’t want to have to do that every single time you make any change that might affect this - so let’s also create a test, based on our shell session above.
Add the following to polls/tests.py:
polls/tests.py
from django.urls import reverse
and we’ll create a shortcut function to create questions as well as a new test class:
polls/tests.py
def create_question(question_text, days):
    """
    Creates a question with the given `question_text` and published the
    given number of `days` offset to now (negative for questions published
    in the past, positive for questions that have yet to be published).
    """
    time = timezone.now() + datetime.timedelta(days=days)
    return Question.objects.create(question_text=question_text, pub_date=time)


class QuestionViewTests(TestCase):
    def test_index_view_with_no_questions(self):
        """
        If no questions exist, an appropriate message should be displayed.
        """
        response = self.client.get(reverse('polls:index'))
        self.assertEqual(response.status_code, 200)
        self.assertContains(response, "No polls are available.")
        self.assertQuerysetEqual(response.context['latest_question_list'], [])

    def test_index_view_with_a_past_question(self):
        """
        Questions with a pub_date in the past should be displayed on the
        index page.
        """
        create_question(question_text="Past question.", days=-30)
        response = self.client.get(reverse('polls:index'))
        self.assertQuerysetEqual(
            response.context['latest_question_list'],
            ['<Question: Past question.>']
        )

    def test_index_view_with_a_future_question(self):
        """
        Questions with a pub_date in the future should not be displayed on
        the index page.
        """
        create_question(question_text="Future question.", days=30)
        response = self.client.get(reverse('polls:index'))
        self.assertContains(response, "No polls are available.")
        self.assertQuerysetEqual(response.context['latest_question_list'], [])

    def test_index_view_with_future_question_and_past_question(self):
        """
        Even if both past and future questions exist, only past questions
        should be displayed.
        """
        create_question(question_text="Past question.", days=-30)
        create_question(question_text="Future question.", days=30)
        response = self.client.get(reverse('polls:index'))
        self.assertQuerysetEqual(
            response.context['latest_question_list'],
            ['<Question: Past question.>']
        )

    def test_index_view_with_two_past_questions(self):
        """
        The questions index page may display multiple questions.
        """
        create_question(question_text="Past question 1.", days=-30)
        create_question(question_text="Past question 2.", days=-5)
        response = self.client.get(reverse('polls:index'))
        self.assertQuerysetEqual(
            response.context['latest_question_list'],
            ['<Question: Past question 2.>', '<Question: Past question 1.>']
        )
Let’s look at some of these more closely.
First is a question shortcut function, create_question, to take some repetition out of the process of creating questions.
test_index_view_with_no_questions doesn’t create any questions, but checks the message: “No polls are available.” and verifies the latest_question_list is empty. Note that the django.test.TestCase class provides some additional assertion methods. In these examples, we use assertContains() and assertQuerysetEqual().
In test_index_view_with_a_past_question, we create a question and verify that it appears in the list.
In test_index_view_with_a_future_question, we create a question with a pub_date in the future. The database is reset for each test method, so the first question is no longer there, and so again the index shouldn’t have any questions in it.
And so on. In effect, we are using the tests to tell a story of admin input and user experience on the site, and checking that at every state and for every new change in the state of the system, the expected results are published.

Testing the DetailView

What we have works well; however, even though future questions don’t appear in the index, users can still reach them if they know or guess the right URL. So we need to add a similar constraint to DetailView:
polls/views.py
class DetailView(generic.DetailView):
    ...
    def get_queryset(self):
        """
        Excludes any questions that aren't published yet.
        """
        return Question.objects.filter(pub_date__lte=timezone.now())
And of course, we will add some tests, to check that a Question whose pub_date is in the past can be displayed, and that one with a pub_date in the future is not:
polls/tests.py
class QuestionIndexDetailTests(TestCase):
    def test_detail_view_with_a_future_question(self):
        """
        The detail view of a question with a pub_date in the future should
        return a 404 not found.
        """
        future_question = create_question(question_text='Future question.', days=5)
        url = reverse('polls:detail', args=(future_question.id,))
        response = self.client.get(url)
        self.assertEqual(response.status_code, 404)

    def test_detail_view_with_a_past_question(self):
        """
        The detail view of a question with a pub_date in the past should
        display the question's text.
        """
        past_question = create_question(question_text='Past Question.', days=-5)
        url = reverse('polls:detail', args=(past_question.id,))
        response = self.client.get(url)
        self.assertContains(response, past_question.question_text)

Ideas for more tests

We ought to add a similar get_queryset method to ResultsView and create a new test class for that view. It’ll be very similar to what we have just created; in fact there will be a lot of repetition.
We could also improve our application in other ways, adding tests along the way. For example, it’s silly that Questions can be published on the site that have no Choices. So, our views could check for this, and exclude such Questions. Our tests would create a Question without Choices and then test that it’s not published, as well as create a similar Question with Choices, and test that it is published.
Perhaps logged-in admin users should be allowed to see unpublished Questions, but not ordinary visitors. Again: whatever needs to be added to the software to accomplish this should be accompanied by a test, whether you write the test first and then make the code pass the test, or work out the logic in your code first and then write a test to prove it.
At a certain point you are bound to look at your tests and wonder whether your code is suffering from test bloat, which brings us to:

When testing, more is better

It might seem that our tests are growing out of control. At this rate there will soon be more code in our tests than in our application, and the repetition is unaesthetic, compared to the elegant conciseness of the rest of our code.
It doesn’t matter. Let them grow. For the most part, you can write a test once and then forget about it. It will continue performing its useful function as you continue to develop your program.
Sometimes tests will need to be updated. Suppose that we amend our views so that only Questions with Choices are published. In that case, many of our existing tests will fail - telling us exactly which tests need to be amended to bring them up to date, so to that extent tests help look after themselves.
At worst, as you continue developing, you might find that you have some tests that are now redundant. Even that’s not a problem; in testing redundancy is a good thing.
As long as your tests are sensibly arranged, they won’t become unmanageable. Good rules-of-thumb include having:
  • a separate TestClass for each model or view
  • a separate test method for each set of conditions you want to test
  • test method names that describe their function

Further testing

This tutorial only introduces some of the basics of testing. There’s a great deal more you can do, and a number of very useful tools at your disposal to achieve some very clever things.
For example, while our tests here have covered some of the internal logic of a model and the way our views publish information, you can use an “in-browser” framework such as Selenium to test the way your HTML actually renders in a browser. These tools allow you to check not just the behavior of your Django code, but also, for example, of your JavaScript. It’s quite something to see the tests launch a browser, and start interacting with your site, as if a human being were driving it! Django includes LiveServerTestCase to facilitate integration with tools like Selenium.
If you have a complex application, you may want to run tests automatically with every commit for the purposes of continuous integration, so that quality control is itself - at least partially - automated.
A good way to spot untested parts of your application is to check code coverage. This also helps identify fragile or even dead code. If you can’t test a piece of code, it usually means that code should be refactored or removed. Coverage will help to identify dead code. See Integration with coverage.py for details.
Testing in Django has comprehensive information about testing.

Source : https://docs.djangoproject.com/en/1.10/intro/tutorial05/